3.8 KiB
Updated July, 2021
octoprint_deploy
These files provide a simple bash script for quickly deploying multiple octoprint instances on a single computer.
How to use
- Ready to go images:
- For OctoPi and OctoBuntu installations, you can download an image that contains this repo and all necessary things here: https://bit.ly/3qPfmti
- OctoPi setup is just like for a normal OctoPi installation. OctoBuntu setup uses standard Ubuntu installation.
- Instructions can be found in the README.txt file (either /home/pi/README.txt or /home/octouser/README.txt), but the basics:
- ssh into or open a terminal on your machine
- Update this repository:
cd octoprint_deploy; git pull; cd - Connect to your base instance and run through the setup to establish admin user. This will be at octopi.local:5000 or whatever server name you gave your OctoBuntu installation.
- Run the add printer script:
sudo octoprint_deploy/addnew_printer.sh - Follow instructions from the scripts. Defaults can be used in almost all cases.
- Default user for Octobuntu images is
octouserwith passwordfooselrulz; please change this password immediately. No root password is set, but this can be done withsudo passwd.
- Stand-alone usage:
- This is for more advanced users that have realtively high command line/Linux familiarity.
- Start up Octoprint for the first time to setup a base instance profile (running on localhost:5000). The base profile will be edited in several places with
INSTANCEto allow modifications during deployment. You can make this as extensive as you like as far as adding different printers, plugins, etc. They can be added for each instance later. This only needs to be done once. - During setup, edit the restart script:
sudo systemctl restart INSTANCE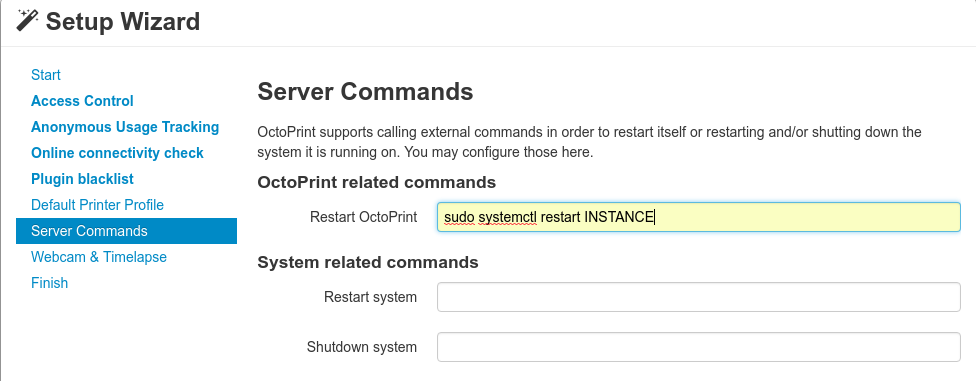
- After the initial setup is done, reload the server and edit the Additional Serial Port field:
/dev/octo_INSTANCE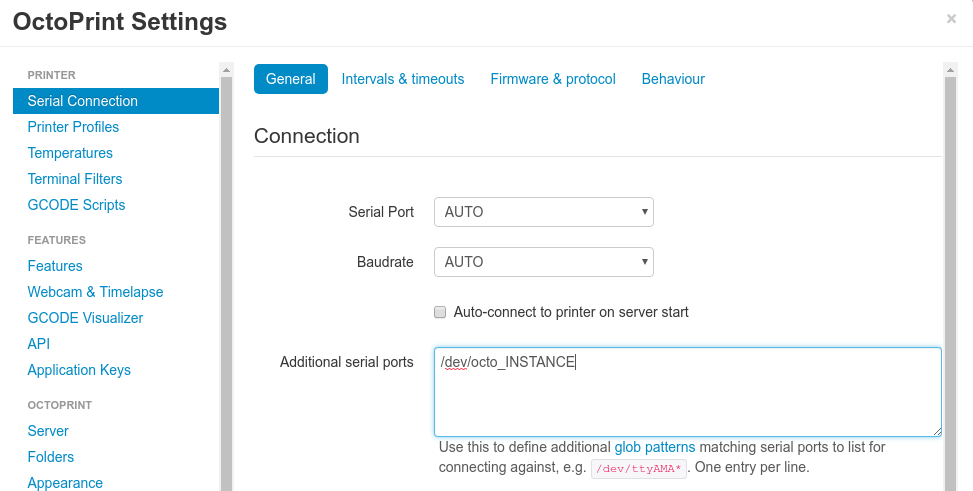
- You can also edit the server name under apperance with:
INSTANCE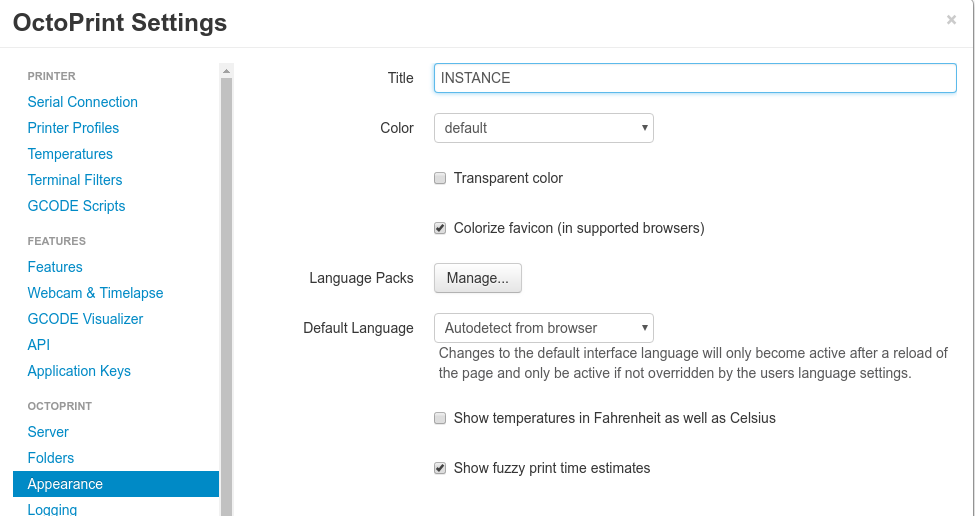
- SAVE your changes, then STOP your currently running octoprint server (Ctrl+C in the terminal you started is sufficient)
- Make sure whichever printer you are installing for is not plugged in via USB
- Go to wherever you downloaded octoprint_deploy:
$ cd octoprint_deploy - Run the bash script:
$ sudo ./addnew_printer.sh - Select 'Other' option and fill in the appropriate information.


Other Features
- Uninstall
- Any instance installed through these scripts can be removed by running the uninstall script. If you use one of the pre-made images, don't remove your base instance!
- USB testing
- The script
usbtesting.shprovides information to help debug auto-detection.
- The script
- Add printer udev entries
- You can use the
printer_udev.shscript to just use the serial number/USB port detection features of these scripts to add udev entires to your machine. This way if you have multiple octoprint instances being run through other means (docker) they can always be linked to a particular device. This will default to /dev/octo_[INSTANCE], so you must change the additional serial port field (see above) in your octoprint setup in order to see these (easiest is just to use /dev/octo_*).
- You can use the
Because each octoprint instance is coming from the same source files, any global modifications you make to octoprint (adding/removing plugins, updating octoprint) are all automatically applied to all of your instances and will take effect when you restart that instance.
Other
You likely want to allow the user that is running the octoprint instance to start/stop/restart services. This can be accomplished with: sudo visudo. It is recommended to read up on how to do this without a password. Most generally this can be done by adding paul ALL=(ALL) NOPASSWD:ALL to the sudoers file. However, THERE ARE RISKS TO DOING THIS, so consider wisely.